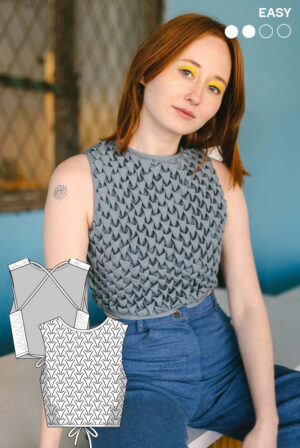
For a professional appearance of a garment, open or even frayed edges are usually undesirable. To avoid this, so-called binding tapes are often used to hide seams, emphasize fabric edges or simply for a clean finish. But did you know that there is a trick that can be used to finish fabric edges, curves, and corners particularly neatly? A great and neat solution is binding and sewing with bias tape and in this article, we would like to show you everything you need to know about it.
Content:
1. What is bias tape used for?
2. What is bias tape used for in sewing and why?
3. What is bias tape sewing?
4. Make bias tape yourself
5. The best fabric for bias tape: differences between jersey bias tape and cotton bias tape.
1. What is bias tape used for?
What is bias tape used for and what is the difference to any other binding? The answer and the biggest difference can already be seen in the name. While normal binding tape is cut either crosswise or perpendicular to the grain/ selvedge, bias tape is cut “diagonally”, i.e. at a 45° angle to the grain. And this feature gives the tape a very important property that makes it ideal for binding curves and corners. This is because the diagonal Grainline gives the tape a certain elasticity even with a firm fabric. . And unlike other binding tapes, it wraps better around curves without forming folds or waves, making it particularly easy to give your edges a professional look.

2. What is bias tape used for in sewing and why?
As already mentioned, if you are wondering what do you use bias tape for, you should take a look at the edges and hems of your garment. These are, as so often, a point where you can get creative.
Bias binding on hems
Sewing hems can be one of the most difficult parts of finishing a garment. It can become too wrinkled, uneven, chunky, too long or too short. Bias tape can be a simple and beautiful solution here.

Bias tape as a contrasting detail
A bias tape in a contrasting color can add an eye-catching visual accent that enhances the design of the garment or project. You can also use it to highlight certain areas, such as details like pockets, zippers or special seams.

Jersey bias binding
If you want to enhance a jersey piece with a bias tape, you should also use a jersey bias tape. This is because, like the rest of the jersey fabric, it adapts to your movements and prevents constriction. This makes it ideal for projects such as T-shirts, jersey tops, sportswear or even underwear.

Bias tape for inside finishing
You can use bias tape to enclose the seam allowances on the inside of your piece. This finish works best with single folded tape and is most used on unlined garments such as jackets and skirts. You can choose a color that matches your fabric, but for a more striking effect you can use a contrasting color or even a patterned fabric.
https://blog.treasurie.com/hong-kong-finish-bias-seams
And if you can’t find what you’re looking for in the selection of bias tapes available to buy, you can also make your own suitable bias tape, but more on that below. Apart from the neat appearance, sewing with bias tape prevents fraying and gives hems more stability. Although serging with bias tape is somewhat more labor-intensive, it often looks more elegant and of higher quality. For the Emily Vest pattern, the bias tape is used in a matching color for the entire edges and also the piped pockets. And on the Liza jersey top pattern, the bias tape is made from the same jersey fabric as the rest of the top.
3. What is bias tape sewing?
Materials for sewing with bias binding
The most common bias tapes are made from woven cotton fabric, but you can also find some made from, satin or Jersey for example. The width is also available in different sizes but has no influence on the length of the garment, as the bias tape lies smoothly around the edge and no seam allowance is required there either. However, the width has an influence on how wide the edging appears.
Bias tapes from the shop are usually sold folded. There are two main types: single-folded and double-folded tape. Single-folded bias tape has two folds, while double-folded bias tape has three folds. Double-fold bias tape is usually used hemming an edge and is visible from the outside of a garment, while single-fold bias tape is used as a narrow facing that is turned to the wrong side of the garment.
A bias tape jersey is less common, but it is also easy to make yourself if you keep a few things in mind. You can find out more about this and the differences between jersey bias tape and cotton bias tape below.
Bias tape sewing
When binding with bias tape, a certain amount of dexterity and neat workmanship is very important to ensure that the edges finish nicely. But here you can see how you can easily hem an armhole with bias tape in just 4 steps!
If you want to join in right away, grab The Emily Vest sewing pattern and get started!
Lay the bias tape right sides together and edge to edge on the section to be edged and secure with pins.
Sew on the bias tape at the desired width from the edge along the entire length using a straight stitch.
Corners and curves
The special feature of the bias tape is particularly useful for curves and corners. This is because the elasticity gained means that the bias tape can be easily stretched to fit curves such as necklines or armholes, allowing it to shape itself beautifully to the curves. However, this only applies to inner curves; for outer curves, the bias tape can be kept slightly and sewn on more loosely.
Mitred corners with bias binding
You can use the so-called mitred corner technique to hem corners with a bias tape. To do this, sew the bias tape along the edge, right sides together, as with a straight edge and sew up to the corner. Then fold the bias tape straight up, hold the resulting corner and fold the bias tape back over to the other edge to be hemmed. Then sew the bias tape along the second edge from the last seam end. When the bias tape is now placed around the edge, a diagonal to the corner is created on both sides. The bias tape should be sewn on smoothly like this.

https://naehfrosch.de/schraegband-um-ecken-naehen
But if you want to try out sewing with bias tape first and learn what do you use bias tape for, take a look at the summer dress sewing pattern The Utah Dress, where the neckline is finished with a bias tape. A great project for you to try out and learn the technique.
4. Make bias tape yourself
Although there are numerous variations of bias tape in different colors and fabrics available for purchase, you naturally want the bias tape to match your project perfectly, or you want to finish your project quickly and don’t have any bias tape in the house right now. And sometimes it’s chic and practical to make your own individual bias binding.

https://www.kaliko.co/blogs/articles/patchworking-tutorial-diy-quilted-bag
You don’t need many tools and materials for this either. You need the desired fabric, whether cotton, jersey, or another fabric. Then a fabric scissors or a rotary cutter, a ruler and a marker pen or chalk.
And then it’s not that complicated. Take the fabric you want to use for your bias binding. The only important thing now is that you cut the strips at a 45° angle to the grain. The width is calculated by multiplying the desired width that you want to see later on the edging by 4. For example, if you want a bordered edge of 1 cm, the bias tape must be 4 cm wide.

https://grainlinestudio.com/blogs/blog/how-to-make-your-own-bias-tape
If the length of the strips of your fabric is not long enough and you are perhaps using fabric remnants, you can also sew the strips together. To do this, place two strips right sides together at the ends so that they form a right angle. Then sew the strips together with a straight seam and fold them open.
https://grainlinestudio.com/blogs/blog/how-to-make-your-own-bias-tape
If you have ever bought bias tape, you will know that it is usually already folded into the shape that it will later have around the edge. You can prepare this in the same way with a homemade bias tape. You can either iron around the ribbon in the middle and at the edges or use a bias tape former to fold the strip into the desired shape and you can also fix it with an iron.
5. The best fabric for bias tape: differences between jersey bias tape and cotton bias tape
Basically, the best fabric for bias tape should be chosen according to the fabric of your project. . If you want to hem jersey pieces, you should also use a jersey bias tape, because although a bias tape made of cotton, for example, will also have some elasticity, a woven fabric will never have the same elasticity as a jersey fabric. To avoid problems, you should always sew jersey to jersey. And since jersey is already stretchy as a fabric, there is still something to consider here. For binding a jersey hem, it is advisable not to cut the tape at an angle to the grain, but at a 90° angle to the grain for more elasticity or in the grain for less elasticity.
6. What to use instead of bias tape
You have now mastered what to use bias tape for and how best to use it. But what can I use instead of bias tape? ? Of course, it is also possible to dispense edging or neatening edges altogether, but the choice depends on the desired end result of your project. You can also simply finish the edges and seam allowances with an overlock or zigzag seam or with a folded hem. . Different finishes produce very different looks and have a major impact on the finished result. So, think carefully about which edges and hem finish you want to choose for your project. If you are still looking for some inspiration, take a look through the modern sewing patterns to be inspired by different techniques.
It’s worth trying out different techniques to find out what suits your project, but hopefully sewing with bias tape is now an option for you too.
Hopefully this article has shown you the possibilities of bias tape and how sewing with bias tape works. Try it out now and discover what makes bias tape so special in your next project. Happy sewing!
More sewing patterns with bias binding:
-
 THE EMILY VEST | Sewing patternFrom 9,95 €
incl. VAT
zzgl. Versandkosten
-
 THE UTAH DRESS | Sewing patternFrom 9,95 €
incl. VAT
zzgl. Versandkosten
-
 THE GIGI TOP | Sewing patternFrom 7,95 €
incl. VAT
zzgl. Versandkosten
-
 THE CARA TOP | Sewing patternFrom 7,95 €
incl. VAT
zzgl. Versandkosten
-
 THE LIZA TOP | Sewing patternFrom 7,95 €
incl. VAT
zzgl. Versandkosten


